 along the edge, hold down the left mouse button, and then drag to a new
location.
along the edge, hold down the left mouse button, and then drag to a new
location.The Voxler managers, toolbars, and menu bar display in a docked view by default; however, they can also be displayed as floating windows. The visibility, size, and position of each item may also be changed.
Use the View | Toolbars, View | Status Bar, View | Managers | Network Manager, View | Managers | Property Manager, and View | Managers | Module Manager commands to turn these components on or off.
To dock a manager or toolbar in a new location, click the grip bar
along the edge, hold down the left mouse button, and then drag to a new
location.
To display as a floating window, drag the bar away from a window edge. Alternatively, double-click on the window title to toggle between having the window docked and floating.
To restore the original docked position, either double-click on the title bar or click and hold the left mouse button on the title bar and drag the window back to the desired docked location.
To restore the default size and position of all managers and toolbars, click the View | Reset Windows command. This command is especially handy if your windows or managers become hidden for any reason.
You must restart Voxler in order for this command to take effect. Click Yes in the dialog, close the program, and reopen Voxler. The managers are now in the default locations. To cancel the command, click No in the dialog.
Voxler windows display in a docked view by default. They can be detached to display as floating windows. To change the position of a docked Module Manager, Network Manager, or Property Manager, click the window title bar and drag it to a new location. Alternatively, double-click the window's title bar to toggle between floating and docked modes.
All of the User interface style selections in the Options dialog display a docking mechanism. To move a manager, left-click the title bar and drag it to a new location while holding down the left mouse button. The docking mechanism displays with arrow indicators as you move the manager. The Visual Studio 2008, Office 2010 Black, Office 2010 Blue, and Office 2010 Silver styles use the mechanism on the right in the image below. The other styles use the mechanism on the left.

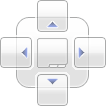
The docking mechanism allows easy docking of windows.
When the cursor touches one of the docking indicators in the docking mechanism, a blue rectangle shows the window docking position. Release the left mouse button to allow the window to be docked in the specific location.
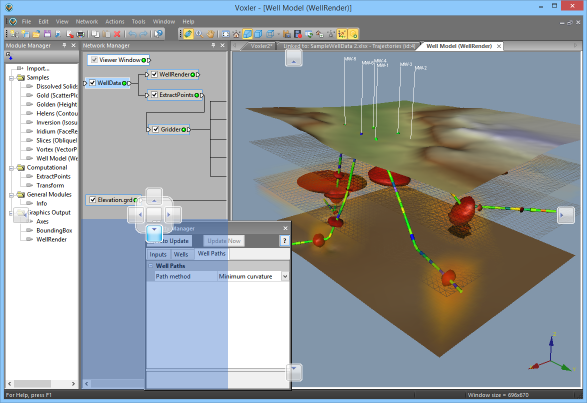
In this example, the docking mechanism is being used to position the Property Manager
back in its default location.
You can view the windows in a stacked or tabbed configuration.
If you want to "stack" the windows:
Drag one window on top of another window.
Position the cursor in either the top or bottom box in the docking mechanism. The screen will turn blue where the manager is to be positioned.
To create tabbed windows:
Drag one window on top of another window.
Position the cursor in the center of the docking mechanism. The screen will turn blue where the manager is to be positioned. You should see a small tab at the bottom of the managers.
To return to individual windows from tabbed view:
Click on the window's name on the tab.
Drag the tab to a new location.

Hold down the left mouse button on a window's
tab and drag the window to a new location
to separate the tabbed windows.
You can increase Viewer window space by minimizing the other
windows with Auto Hide. To hide a docked window, click on the  button in the upper right corner of the Module Manager,
Network Manager, or Property Manager windows. Hold the CTRL
key down and click the button
to auto hide several docked windows in the same "container."
The window hides on the left or right side of Voxler with a small
tab containing the window name.
button in the upper right corner of the Module Manager,
Network Manager, or Property Manager windows. Hold the CTRL
key down and click the button
to auto hide several docked windows in the same "container."
The window hides on the left or right side of Voxler with a small
tab containing the window name.
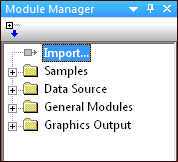
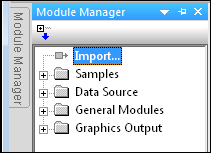
This example shows the
Module Manager. Notice the
pin button is vertical indicating
"show" mode.
When hidden, the window slides under the left or right side of the Voxler main window where it is docked and a tab appears with the window name. Position the mouse pointer over the tab to view the contents of the window. Move your mouse away from the window and the window "hides" again. Click inside the window to anchor it at its current position. Click in another window to release the anchor and hide the window.
When the button is pressed, the
window (Module Manager in this example)
is hidden on the left side of the screen.
To view the window, place the cursor directly over the tab. Click in
the displayed window to keep it open for use. Move the mouse away from
the window or click outside the window to return the window to the hidden
position. Click on the  button in the upper right corner of a window to return it to the normal
display mode and disable the auto hide feature.
button in the upper right corner of a window to return it to the normal
display mode and disable the auto hide feature.
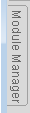
When a window is hidden, place
the cursor over the title on the tab to display
the full window. Notice the pin button is
horizontal indicating "hide" mode.
See Also