5.3 - Changing the Isosurface Properties - Tutorial
We can experiment with the isovalue (constant value) to change the appearance.
To change the isosurface properties:
Click
on the Isosurface
in the Network Manager to
select it.
In
the Property Manager, click
on the General tab.
Change
the value next to Isovalue by
double-clicking on the default value, typing 20, and pressing ENTER
on your keyboard. Alternatively, the  next to the
number can be moved to change the Isovalue.
A new isosurface is calculated and immediately displayed in the Viewer window.
next to the
number can be moved to change the Isovalue.
A new isosurface is calculated and immediately displayed in the Viewer window.
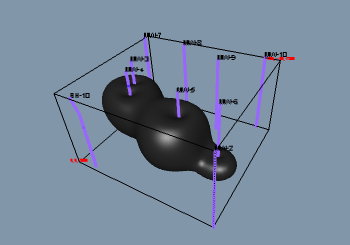
An Isosurface displays
constant value
in three dimensions.
In
the Property Manager, click
the GrayScale color spectrum
next to Colormap and select
Rainbow.
In
the Property Manager, open
the Material section by clicking
the  next to Material.
Change
the Opacity value by highlighting
the existing value, typing 0.5, and pressing ENTER on your keyboard
or moving the until the
value is 0.5. Changing the Opacity
to a lower value allows the isosurface to be partially transparent.
The lower the value, the more transparent the isosurface.

The Colormap and Opacity
settings are
adjusted in the Property Manager.

An Isosurface with a custom Colormap
and Opacity properties.
Back to Creating an Isosurface
Next to A Note About
Transparency