 next
to any well, you can see the Top
information that was imported for that well.
next
to any well, you can see the Top
information that was imported for that well.For this example, well collars, trajectory data, and log data are on three tabs of an Excel spreadsheet. Each tab is imported separately, with the following steps.
Click the File | Import command.
In the Import dialog, select the well collar file. For this example, select the SampleWellData 2.xlsx file from the Samples directory. By default, the Samples directory is located at C:\Program Files\Golden Software\Voxler 4\Samples.
Click Open.
In the XLSX Import Options dialog, select the Collars table and click OK. A Data Source module is added to the Network Manager.
Click on the SampleWellData 2.xlsx - Collars module to view its properties in the Property Manager.
In the Property Manager
In the Output section set the Output type to Wells. Note that the column properties change from point data properties to well data properties.
In the Well Columns section, set the Sheet type to Collars by clicking the current selection (All) and selecting Collars from the list.
Double-click on WellData in the Well folder of the Module Manager, or right-click on the SampleWellData 2.xlsx - Collars module and select Well | WellData. A WellData module is added and automatically connected to the collars data module.
In the Property Manager for the SampleWellData 2.xlsx - Collars module, you can see that the data columns were automatically specified correctly once the Sheet type was changed to Collars. Voxler assigns data columns based on column order for both well and point data. Refer to the Data Source Module topic in the online help for more information about automatic column assignment.
In the Property
Manager, the Wells page
shows the six wells that were imported. If you click on the next
to any well, you can see the Top
information that was imported for that well.
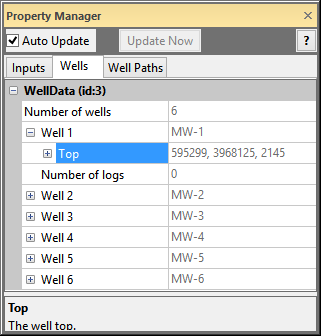
The collar information is displayed as the well Top.
Back to Importing Well Data
Next to Importing Well Trajectory Information