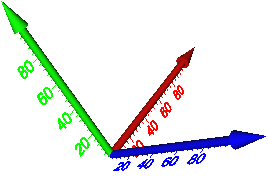
Change the axis properties in the X Axis,
Y Axis, and Z Axis sections of the
Property Manager.
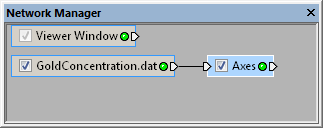
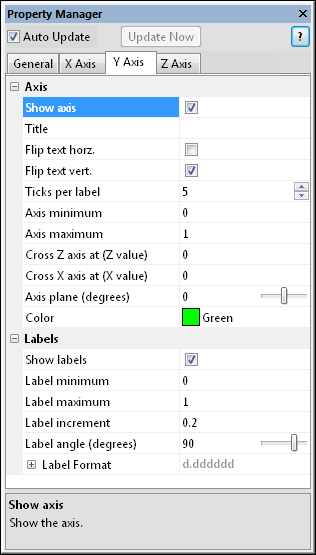
The Axes module Y Axis page displays the properties of the Y Axis. To open the Y Axis page, click on the Axes module in the Network Manager. In the Property Manager, click on the Y Axis tab.

Change the axis properties in the X Axis,
Y Axis, and Z Axis sections of the
Property Manager.
The Y Axis property sections of the Axes module are described below.

Select the Axes module in the Network Manager
to display its properties in the Property Manager.
The Axes module contains the following tabs in the Property Manager:
Y Axis

Customize the Y Axis properties.
Check the box next to the Show axis command to show the axis. Uncheck the box to turn the display off for the selected axis.
Enter text in the Title section to give the axis a title.
Check the box next to the Flip text horz. or Flip text vert. commands to flip the label and title text horizontally or vertically for easier viewing after rotating the view.
The Ticks per label option controls how many tick mark divisions occur between each pair of labels. If the Ticks per label value is set to 2, one tick mark and two divisions will occur between labels. This value can be between 1 (no intermediate tick marks) and 100. To change the value, highlight the existing value and type a new number or click and drag the  to increase or decrease the number of ticks.
Enter a minimum data value next to Axis minimum for the starting axis value and a maximum data value next to Axis maximum for the ending axis value. Labels are drawn between the Label minimum and Label maximum values. If the Label minimum and Label maximum values are different than the Axis minimum and Axis maximum values, part of the axis will be displayed without labels.
Axes are drawn in the coordinate system of the input object and do not reflect any changes applied via the Transform module.
The Cross ... axis at (... value) value is the value at which the selected axis crosses the specified axis. Highlight the existing value and type a new value to change this. Axis values are in the coordinate system of the input object and do not reflect any changes applied via the Transform module.
The Axis plane (degrees) contains the labels and tick marks, and can be specified as a rotation angle around the axis. The direction of rotation is specified by the right hand rule. Take your right hand and point your thumb in the direction of the positive rotation axis. The direction your fingers are curled is the direction of positive rotation angles. Angles are in degrees and range from -180 to +180. To change the rotation, highlight the existing value and type a new value or click and drag the  to increase or decrease the values.
The Color section specifies the color of the axis and the axis labels and title text. To change the color, click the existing color box and select a new color from the color palette. Click on the desired color or click the Other button to open the Colors dialog to set custom colors.
Check the box next to the Show labels command to show tick marks and labels along the selected axis. Uncheck the box to hide the tick marks and labels.
Enter a minimum data value next to Label minimum for the first label and a maximum data value next to Label maximum for the last label. Labels are only drawn between the Label minimum and Label maximum values. The axis is drawn between the Axis minimum and Axis maximum values.
Axes are drawn in the coordinate system of the input object and do not reflect any changes applied via the Transform module.
The Label increment option sets the distance in axis units between adjacent labels. To change the spacing between labels, highlight the existing value and type a new value.
The Label angle (degrees) option controls the angle the label is displayed. To change the value, highlight the existing value and type a new value or click and drag the  . Values are in degrees and range from -180 to + 180 degrees. Positive values rotate the label clockwise.
Click the  next to the Label Format command to open the label format section. Set the Type, Significant digits, Prefix, and Postfix of axis labels.
See Also